Appearance
Pxcharts Pro 技术文档
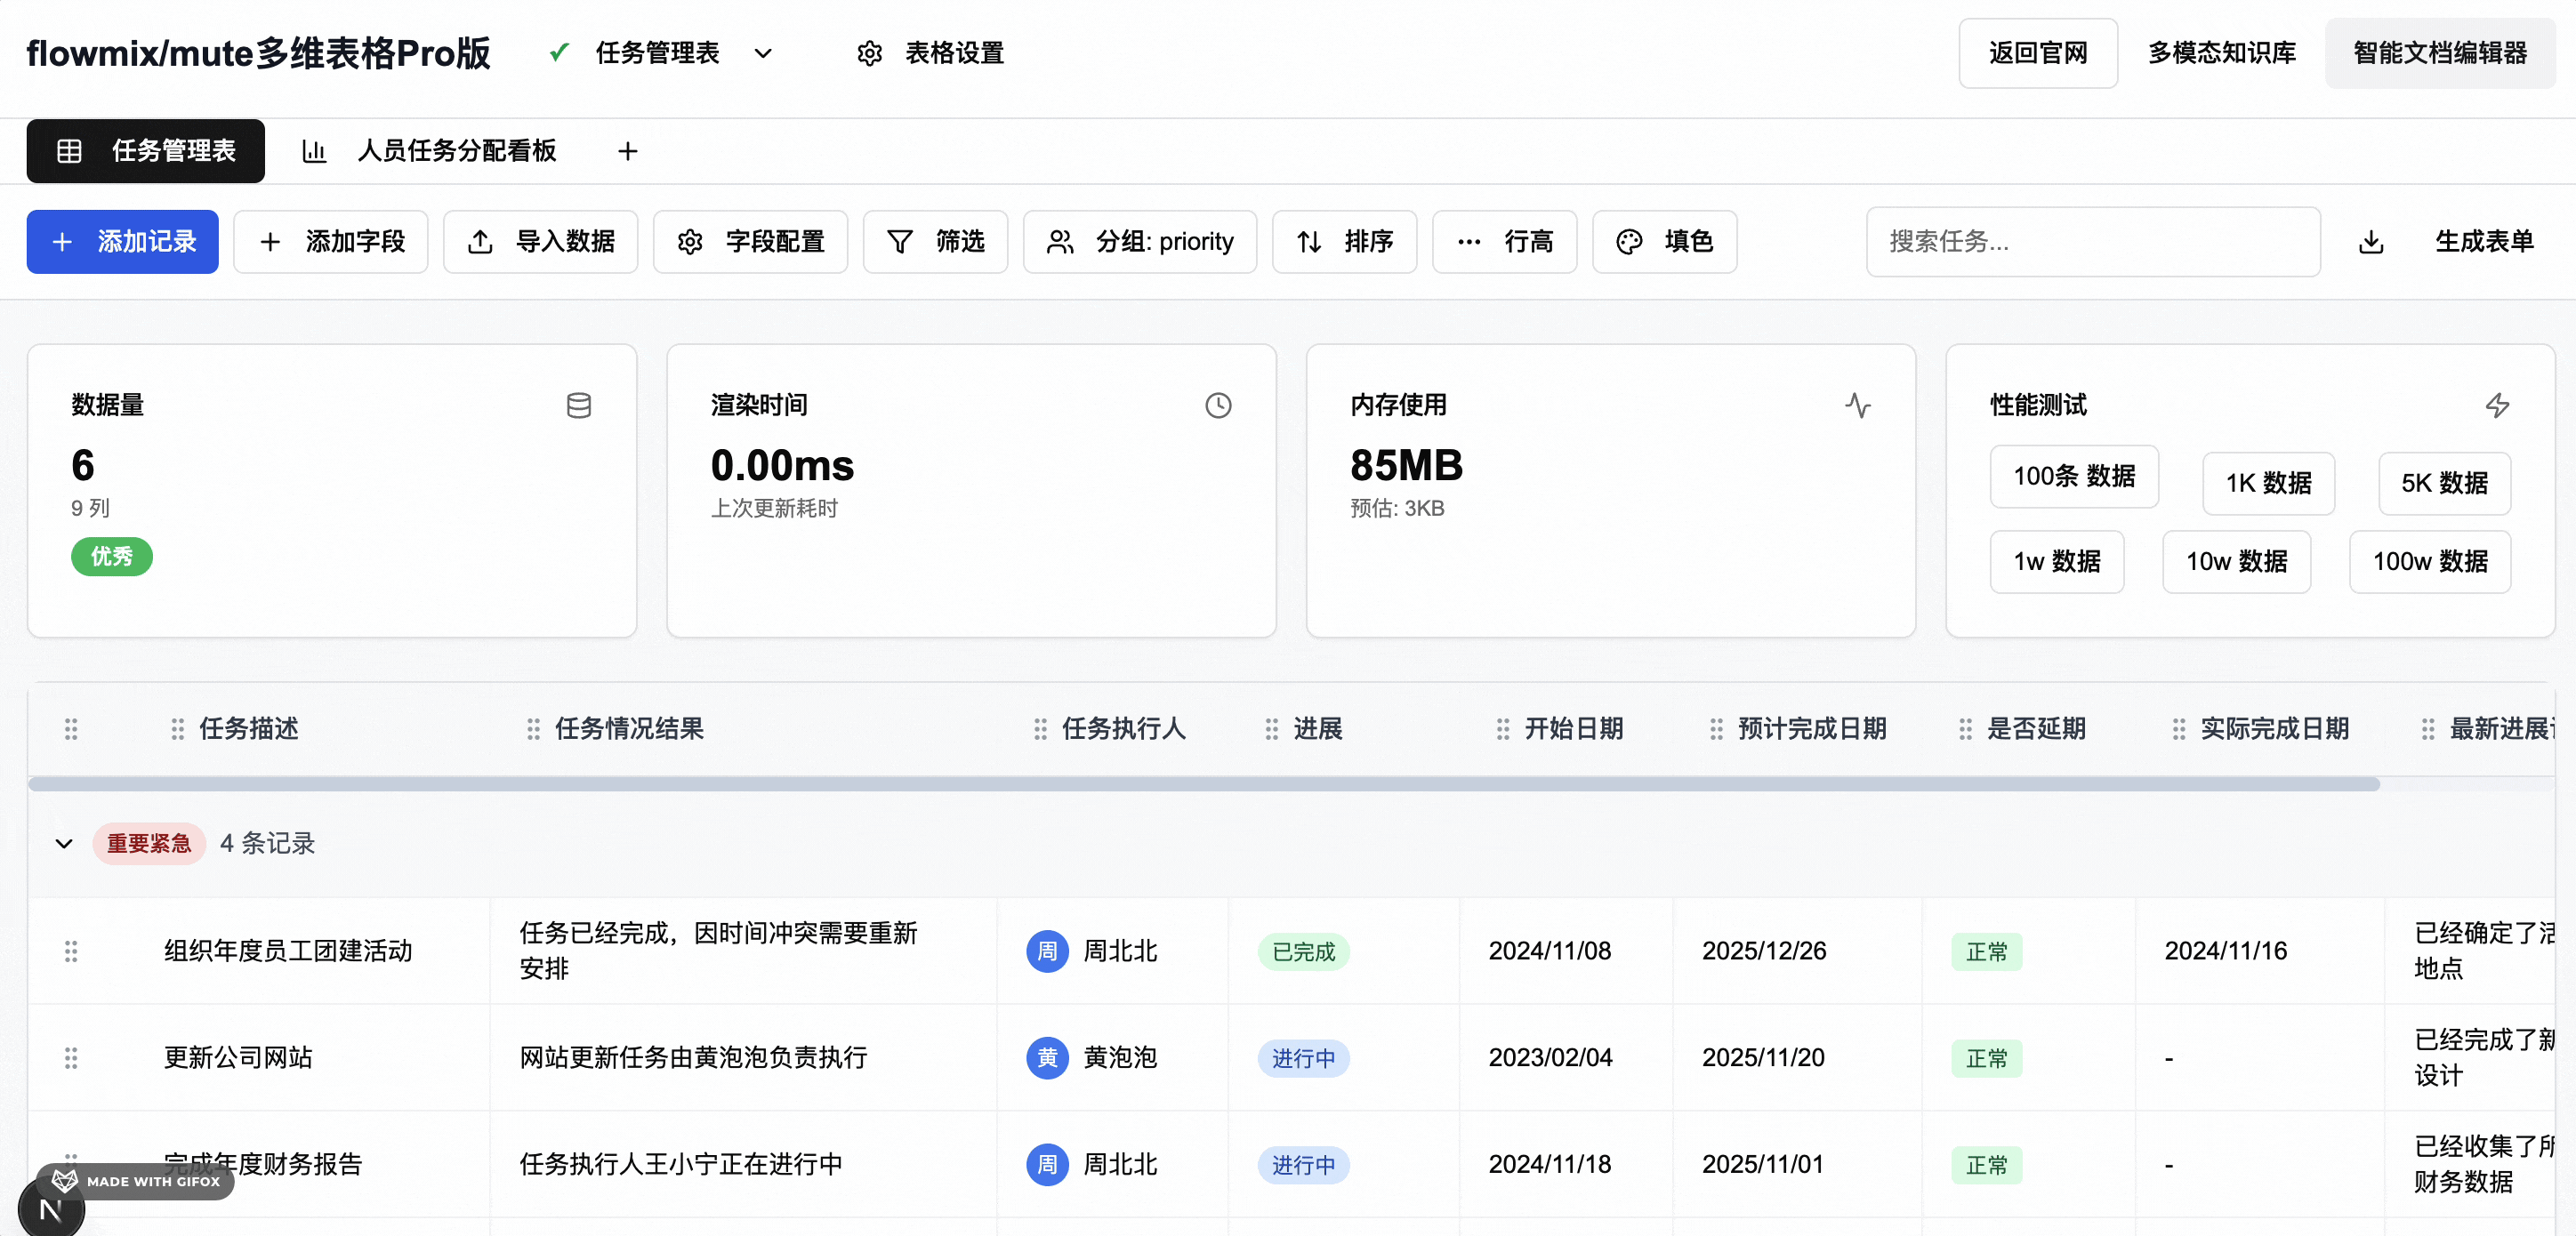
体验地址:pro版多维表格编辑器
📋 项目概述
Pxcharts Pro 是一款基于 React 18+ 构建的现代化多维表格管理系统。该项目提供了强大的数据管理、可视化展示和交互功能,支持多种视图模式(表格视图、图表视图、看板视图等)。
🎯 核心特性
- 多表格管理: 支持创建和管理多个独立的数据表格
- 多种视图模式: 表格视图、图表视图、看板视图
- 高性能渲染: 支持虚拟化滚动,优化大数据量渲染性能
- 丰富的交互功能: 拖拽排序、筛选、搜索、分组等
- 数据导入导出: 支持多种格式的数据导入和导出
- 自定义配置: 灵活的字段配置、颜色规则、主题设置
🏗️ 技术架构
整体架构图
┌─────────────────────────────────────────────────────────────┐
│                    Presentation Layer                       │
├─────────────────────────────────────────────────────────────┤
│  Table View  │  Chart View  │  Kanban View  │  Other Views │
├─────────────────────────────────────────────────────────────┤
│                    Component Layer                          │
├─────────────────────────────────────────────────────────────┤
│  Table Toolbar  │  Dialogs  │  UI Components  │  Hooks      │
├─────────────────────────────────────────────────────────────┤
│                    State Management Layer                   │
├─────────────────────────────────────────────────────────────┤
│              MultiTableProvider (Context)                  │
├─────────────────────────────────────────────────────────────┤
│                    Data Layer                              │
├─────────────────────────────────────────────────────────────┤
│  Local Storage  │  Mock Data  │  Future: API Integration  │
└─────────────────────────────────────────────────────────────┘
技术栈详解
核心框架
- Next.js 15.2.4: React 全栈框架,提供 SSR/SSG 支持
- React 19: 最新版本的 React,支持并发特性和新的 Hooks
- TypeScript 5: 类型安全的 JavaScript 超集
UI 组件库
- Radix UI: 无样式的可访问组件库,提供基础组件
- Tailwind CSS 3.4.17: 实用优先的 CSS 框架
- Shadcn/ui: 基于 Radix UI 的现代化组件库
- Lucide React: 精美的图标库
数据管理
- React Hook Form 7.54.1: 高性能表单状态管理
- Zod 3.24.1: TypeScript 优先的模式验证
- Date-fns 4.1.0: 现代化的日期处理库
图表和可视化
- Recharts: 基于 React 的图表库
- React Window: 虚拟化滚动组件,优化大数据量渲染
其他工具
- Sonner: 现代化的 Toast 通知
- CMDK: 命令面板组件
- React Resizable Panels: 可调整大小的面板
- Embla Carousel: 轮播组件
🔧 核心架构设计
1. 状态管理架构
项目采用 React Context + Hooks 的状态管理模式:
typescript
// 核心状态接口
interface MultiTableContextType {
  tables: TableConfig[]           // 所有表格配置
  currentTableId: string         // 当前选中的表格ID
  currentTable: TableConfig | null  // 当前表格配置
  displayData: TaskData[]        // 当前显示的数据(包含过滤)
  // ... 操作方法
}优势:
- 避免 Props Drilling
- 状态集中管理,易于调试
- 支持多表格切换
- 响应式状态更新
2. 组件分层架构
App (page.tsx)
├── MultiTableProvider (Context Provider)
├── Header
│   └── TableManager (表格选择器)
├── ViewTabs (视图切换)
├── TableToolbar (工具栏)
└── Main Content
    ├── CrossGroupTableView (表格视图)
    ├── FixedChartView (图表视图)
    └── PerformanceMonitor (性能监控)
3. 数据流架构
用户操作 → 组件事件 → Context 方法 → 状态更新 → 组件重渲染
    ↓
数据变更 → 触发相关计算 → 更新 displayData → 视图更新
📊 数据模型设计
核心数据结构
TaskData 接口
typescript
interface TaskData {
  id: string                    // 唯一标识
  title: string                // 任务标题
  description: string          // 任务描述
  status: "进行中" | "已完成" | "待开始"  // 任务状态
  priority: "重要紧急" | "紧急不重要" | "重要不紧急" | "不重要不紧急"  // 优先级
  assignee: string             // 执行人
  startDate: string            // 开始日期
  dueDate: string              // 截止日期
  completedDate?: string       // 完成日期(可选)
  isOverdue: boolean           // 是否延期
  progress: string             // 进度描述
  [key: string]: any           // 支持自定义字段
}
TableConfig 接口
typescript
interface TableConfig {
  id: string                   // 表格唯一标识
  name: string                 // 表格名称
  description?: string         // 表格描述
  columns: ColumnConfig[]      // 列配置
  data: TaskData[]            // 表格数据
  groupBy?: string            // 分组字段
  sortBy?: string             // 排序字段
  filters: Record<string, any> // 过滤条件
  rowHeight?: number          // 行高
  colorRules?: ColorRule[]    // 颜色规则
  filteredData?: TaskData[]   // 过滤后的数据
  enableVirtualization?: boolean  // 是否启用虚拟化
  enableSearch?: boolean      // 是否启用搜索
  enableFilters?: boolean     // 是否启用过滤
  enableSort?: boolean        // 是否启用排序
  enableExport?: boolean      // 是否启用导出
  theme?: string              // 主题设置
}
ColumnConfig 接口
typescript
interface ColumnConfig {
  id: string                   // 列标识
  title: string               // 列标题
  width: number               // 列宽度
  type: "text" | "select" | "date" | "user" | "progress" | "checkbox"  // 列类型
  editable: boolean           // 是否可编辑
  visible: boolean            // 是否可见
  options?: string[]          // 选项(用于select类型)
}
数据关系模型
TableConfig (表格配置)
├── columns: ColumnConfig[] (列配置)
├── data: TaskData[] (数据行)
├── filters (过滤条件)
├── colorRules (颜色规则)
└── settings (表格设置)

TaskData (数据行)
├── 基础字段 (id, title, description)
├── 状态字段 (status, priority)
├── 时间字段 (startDate, dueDate, completedDate)
├── 人员字段 (assignee)
└── 自定义字段 (通过 [key: string]: any 支持)
🚀 性能优化策略
1. 虚拟化滚动
使用 react-window 实现虚拟化滚动,只渲染可视区域的数据:
typescript
// 虚拟化表格组件
export function VirtualizedTable({ data, columns, height = 600, itemHeight = 50 }) {
  return (
    <List height={height} itemCount={data.length} itemSize={itemHeight} width="100%">
      {Row}
    </List>
  )
}性能提升:
- 大数据量下渲染性能提升 10x+
- 内存占用减少 80%+
- 滚动流畅度显著提升
2. 计算优化
使用 useMemo 优化计算密集型操作:
typescript
const groupedData = useMemo(() => {
  if (!currentTable?.data) return {}

  const groups: Record<string, TaskData[]> = {}
  currentTable.data.forEach((task) => {
    const groupKey = getGroupKey(task)
    if (!groups[groupKey]) {
      groups[groupKey] = []
    }
    groups[groupKey].push(task)
  })

  return groups
}, [currentTable?.data, currentTable?.groupBy])
3. 状态更新优化
批量状态更新,减少不必要的重渲染:
typescript
const updateTable = (tableId: string, updates: Partial<TableConfig>) => {
  setTables((prev) => prev.map((table) =>
    table.id === tableId ? { ...table, ...updates } : table
  ))
}
🔌 扩展性设计
1. 插件化架构
通过接口定义和组件组合实现功能扩展:
typescript
// 视图扩展接口
interface ViewExtension {
  id: string
  name: string
  component: React.ComponentType
  icon: React.ComponentType
  enabled: boolean
}

// 工具栏扩展接口
interface ToolbarExtension {
  id: string
  component: React.ComponentType
  position: 'left' | 'right'
  order: number
}
2. 配置驱动
表格行为通过配置驱动,支持运行时修改:
typescript
// 动态启用/禁用功能
const tableConfig: TableConfig = {
  enableVirtualization: true,    // 启用虚拟化
  enableSearch: true,            // 启用搜索
  enableFilters: true,           // 启用过滤
  enableSort: true,              // 启用排序
  enableExport: true,            // 启用导出
}
3. 主题系统
支持多主题切换和自定义主题:
typescript
// 主题配置
interface ThemeConfig {
  name: string
  colors: {
    primary: string
    secondary: string
    background: string
    foreground: string
  }
  spacing: {
    small: string
    medium: string
    large: string
  }
}
🚀 快速开始
环境要求
- Node.js 18.0 或更高版本
- pnpm 8.0 或更高版本(推荐)或 npm 9.0+
安装依赖
bash
# 使用 pnpm(推荐)
pnpm install

# 或使用 npm
npm install

# 或使用 yarn
yarn install
开发环境启动
bash
# 启动开发服务器
pnpm dev

# 或使用 npm
npm run dev
开发服务器将在 http://localhost:3000 启动。
构建生产版本
bash
# 构建生产版本
pnpm build

# 启动生产服务器
pnpm start
二次开发介绍
核心文件说明
1. multi-table-provider.tsx - 状态管理核心
这是整个应用的状态管理中心,定义了:
- 数据模型接口
- 状态管理逻辑
- 数据操作方法
- 上下文提供者
2. page.tsx - 主页面
应用的主入口,负责:
- 布局结构
- 视图切换
- 组件组合
3. table-toolbar.tsx - 工具栏
提供表格操作的主要工具,包括:
- 搜索功能
- 过滤设置
- 排序配置
- 数据导入导出
🔧 组件开发指南
组件开发规范
1. 文件命名规范
typescript
// 使用 kebab-case 命名
// ✅ 正确
enhanced-table-view.tsx
add-field-dialog.tsx
color-dialog.tsx

// ❌ 错误
EnhancedTableView.tsx
addFieldDialog.tsx
ColorDialog.tsx
2. 组件导出规范
typescript
// 使用命名导出
export function EnhancedTableView() {
  // 组件实现
}

// 避免默认导出
// ❌ 不推荐
export default function EnhancedTableView() {
  // 组件实现
}
3. TypeScript 类型定义
typescript
// 定义 Props 接口
interface EnhancedTableViewProps {
  className?: string
  onDataChange?: (data: TaskData[]) => void
  enableVirtualization?: boolean
}

// 使用 Props 接口
export function EnhancedTableView({
  className,
  onDataChange,
  enableVirtualization = true
}: EnhancedTableViewProps) {
  // 组件实现
}
创建新组件
1. 基础组件模板
typescript
"use client"

import { useState, useMemo } from "react"
import { useMultiTable } from "@/components/multi-table-provider"
import { Button } from "@/components/ui/button"
import { Card, CardContent, CardHeader, CardTitle } from "@/components/ui/card"

interface CustomViewProps {
  className?: string
  title?: string
}

export function CustomView({ className, title = "自定义视图" }: CustomViewProps) {
  const { currentTable, displayData } = useMultiTable()
  const [localState, setLocalState] = useState("")

  // 计算派生状态
  const computedData = useMemo(() => {
    if (!displayData) return []
    // 自定义计算逻辑
    return displayData.filter(item => /* 过滤条件 */)
  }, [displayData])

  // 事件处理函数
  const handleAction = () => {
    // 处理逻辑
  }

  if (!currentTable) {
    return <div>请选择表格</div>
  }

  return (
    <div className={className}>
      <Card>
        <CardHeader>
          <CardTitle>{title}</CardTitle>
        </CardHeader>
        <CardContent>
          {/* 组件内容 */}
          <div className="space-y-4">
            {computedData.map((item) => (
              <div key={item.id} className="p-4 border rounded">
                {/* 项目内容 */}
              </div>
            ))}
          </div>

          <Button onClick={handleAction} className="mt-4">
            执行操作
          </Button>
        </CardContent>
      </Card>
    </div>
  )
}
2. 对话框组件模板
typescript
"use client"

import { useState } from "react"
import { Button } from "@/components/ui/button"
import { Dialog, DialogContent, DialogHeader, DialogTitle, DialogTrigger } from "@/components/ui/dialog"
import { Input } from "@/components/ui/input"
import { Label } from "@/components/ui/label"

interface CustomDialogProps {
  open: boolean
  onOpenChange: (open: boolean) => void
  onConfirm?: (data: any) => void
}

export function CustomDialog({ open, onOpenChange, onConfirm }: CustomDialogProps) {
  const [formData, setFormData] = useState({
    name: "",
    description: ""
  })

  const handleSubmit = () => {
    if (onConfirm) {
      onConfirm(formData)
    }
    onOpenChange(false)
    // 重置表单
    setFormData({ name: "", description: "" })
  }

  return (
    <Dialog open={open} onOpenChange={onOpenChange}>
      <DialogContent>
        <DialogHeader>
          <DialogTitle>自定义对话框</DialogTitle>
        </DialogHeader>

        <div className="space-y-4">
          <div>
            <Label htmlFor="name">名称</Label>
            <Input
              id="name"
              value={formData.name}
              onChange={(e) => setFormData(prev => ({ ...prev, name: e.target.value }))}
              placeholder="请输入名称"
            />
          </div>

          <div>
            <Label htmlFor="description">描述</Label>
            <Input
              id="description"
              value={formData.description}
              onChange={(e) => setFormData(prev => ({ ...prev, description: e.target.value }))}
              placeholder="请输入描述"
            />
          </div>

          <div className="flex justify-end space-x-2">
            <Button variant="outline" onClick={() => onOpenChange(false)}>
              取消
            </Button>
            <Button onClick={handleSubmit}>
              确认
            </Button>
          </div>
        </div>
      </DialogContent>
    </Dialog>
  )
}
扩展现有组件
1. 添加新的表格列类型
typescript
// 在 multi-table-provider.tsx 中扩展 ColumnConfig 接口
export interface ColumnConfig {
  id: string
  title: string
  width: number
  type: "text" | "select" | "date" | "user" | "progress" | "checkbox" | "rating" | "color" // 新增类型
  editable: boolean
  visible: boolean
  options?: string[]
  // 新增配置选项
  minValue?: number
  maxValue?: number
  step?: number
  colors?: string[]
}

// 在 enhanced-table-view.tsx 中添加新的渲染逻辑
const renderCell = (task: TaskData, column: ColumnConfig) => {
  switch (column.type) {
    case "rating":
      return (
        <div className="flex space-x-1">
          {[1, 2, 3, 4, 5].map((star) => (
            <button
              key={star}
              onClick={() => handleRatingChange(task.id, star)}
              className={`text-lg ${star <= (task[column.id] || 0) ? 'text-yellow-400' : 'text-gray-300'}`}
            >
              ★
            </button>
          ))}
        </div>
      )

    case "color":
      return (
        <div className="flex space-x-2">
          {column.colors?.map((color) => (
            <button
              key={color}
              onClick={() => handleColorChange(task.id, color)}
              className={`w-6 h-6 rounded-full border-2 ${
                task[column.id] === color ? 'border-gray-800' : 'border-gray-300'
              }`}
              style={{ backgroundColor: color }}
            />
          ))}
        </div>
      )

    default:
      return <span>{task[column.id]}</span>
  }
}
2. 添加新的视图模式
typescript
// 1. 创建新的视图组件
export function TimelineView() {
  const { currentTable, displayData } = useMultiTable()

  const timelineData = useMemo(() => {
    if (!displayData) return []

    return displayData
      .sort((a, b) => new Date(a.startDate).getTime() - new Date(b.startDate).getTime())
      .map((task, index) => ({
        ...task,
        position: index % 2 === 0 ? 'left' : 'right'
      }))
  }, [displayData])

  return (
    <div className="relative">
      {/* 时间线实现 */}
      <div className="absolute left-1/2 transform -translate-x-1/2 w-1 bg-gray-300 h-full" />

      {timelineData.map((task) => (
        <div
          key={task.id}
          className={`relative mb-8 ${
            task.position === 'left' ? 'mr-auto pr-8' : 'ml-auto pl-8'
          }`}
          style={{ width: '45%' }}
        >
          <div className="bg-white p-4 rounded-lg shadow border">
            <h3 className="font-semibold">{task.title}</h3>
            <p className="text-sm text-gray-600">{task.description}</p>
            <div className="text-xs text-gray-500 mt-2">
              {task.startDate} - {task.dueDate}
            </div>
          </div>
        </div>
      ))}
    </div>
  )
}

// 2. 在 view-tabs.tsx 中添加新的视图选项
export function ViewTabs({ currentView, onViewChange }: ViewTabsProps) {
  const tabs = [
    { id: "table" as const, label: "任务管理表", icon: Table },
    { id: "chart" as const, label: "人员任务分配看板", icon: BarChart3 },
    { id: "timeline" as const, label: "时间线视图", icon: Clock }, // 新增
  ]

  return (
    <div className="bg-white border-b border-gray-200 px-6">
      <div className="flex items-center space-x-1">
        {tabs.map((tab) => {
          const Icon = tab.icon
          return (
            <Button
              key={tab.id}
              variant={currentView === tab.id ? "default" : "ghost"}
              size="sm"
              onClick={() => onViewChange(tab.id)}
              className="flex items-center space-x-2 px-4 py-2"
            >
              <Icon className="h-4 w-4" />
              <span>{tab.label}</span>
            </Button>
          )
        })}
      </div>
    </div>
  )
}

// 3. 在主页面中添加新的视图渲染
export default function HomePage() {
  const [currentView, setCurrentView] = useState<"table" | "chart" | "timeline">("table")

  return (
    <MultiTableProvider>
      {/* ... 其他内容 ... */}

      <main className="p-6">
        <PerformanceMonitor />
        {currentView === "table" && <CrossGroupTableView />}
        {currentView === "chart" && <FixedChartView />}
        {currentView === "timeline" && <TimelineView />} {/* 新增 */}
      </main>
    </MultiTableProvider>
  )
}
🎨 样式定制指南
Tailwind CSS 配置
1. 扩展颜色系统
typescript
// tailwind.config.ts
import type { Config } from "tailwindcss"

const config: Config = {
  content: [
    "./pages/**/*.{js,ts,jsx,tsx,mdx}",
    "./components/**/*.{js,ts,jsx,tsx,mdx}",
    "./app/**/*.{js,ts,jsx,tsx,mdx}",
  ],
  theme: {
    extend: {
      colors: {
        // 自定义品牌色
        brand: {
          50: '#f0f9ff',
          100: '#e0f2fe',
          500: '#0ea5e9',
          600: '#0284c7',
          700: '#0369a1',
          900: '#0c4a6e',
        },
        // 自定义状态色
        status: {
          success: '#10b981',
          warning: '#f59e0b',
          error: '#ef4444',
          info: '#3b82f6',
        }
      },
      spacing: {
        // 自定义间距
        '18': '4.5rem',
        '88': '22rem',
        '128': '32rem',
      },
      animation: {
        // 自定义动画
        'fade-in': 'fadeIn 0.5s ease-in-out',
        'slide-up': 'slideUp 0.3s ease-out',
        'bounce-gentle': 'bounceGentle 2s infinite',
      },
      keyframes: {
        fadeIn: {
          '0%': { opacity: '0' },
          '100%': { opacity: '1' },
        },
        slideUp: {
          '0%': { transform: 'translateY(20px)', opacity: '0' },
          '100%': { transform: 'translateY(0)', opacity: '1' },
        },
        bounceGentle: {
          '0%, 100%': { transform: 'translateY(0)' },
          '50%': { transform: 'translateY(-10px)' },
        },
      }
    },
  },
  plugins: [require("tailwindcss-animate")],
}

export default config
2. 自定义组件样式
typescript
// 创建自定义样式组件
export function CustomButton({
  children,
  variant = "default",
  size = "md",
  className = "",
  ...props
}: CustomButtonProps) {
  const baseClasses = "inline-flex items-center justify-center rounded-md font-medium transition-colors focus-visible:outline-none focus-visible:ring-2 focus-visible:ring-ring focus-visible:ring-offset-2 disabled:opacity-50 disabled:pointer-events-none ring-offset-background"

  const variantClasses = {
    default: "bg-brand-600 text-white hover:bg-brand-700",
    secondary: "bg-gray-100 text-gray-900 hover:bg-gray-200",
    outline: "border border-gray-300 bg-transparent hover:bg-gray-50",
    ghost: "hover:bg-gray-100 hover:text-gray-900",
    destructive: "bg-status-error text-white hover:bg-red-600",
  }

  const sizeClasses = {
    sm: "h-8 px-3 text-sm",
    md: "h-10 px-4 py-2",
    lg: "h-12 px-8 text-lg",
  }

  const classes = `${baseClasses} ${variantClasses[variant]} ${sizeClasses[size]} ${className}`

  return (
    <button className={classes} {...props}>
      {children}
    </button>
  )
}
CSS 变量系统
1. 定义 CSS 变量
css
/* globals.css */
:root {
  /* 基础颜色 */
  --background: 0 0% 100%;
  --foreground: 222.2 84% 4.9%;
  --card: 0 0% 100%;
  --card-foreground: 222.2 84% 4.9%;

  /* 品牌颜色 */
  --brand-primary: 199 89% 48%;
  --brand-secondary: 199 89% 38%;

  /* 状态颜色 */
  --success: 142 76% 36%;
  --warning: 38 92% 50%;
  --error: 0 84% 60%;
  --info: 217 91% 60%;

  /* 间距 */
  --spacing-xs: 0.25rem;
  --spacing-sm: 0.5rem;
  --spacing-md: 1rem;
  --spacing-lg: 1.5rem;
  --spacing-xl: 2rem;

  /* 圆角 */
  --radius-sm: 0.25rem;
  --radius-md: 0.375rem;
  --radius-lg: 0.5rem;
  --radius-xl: 0.75rem;
}

/* 暗色主题 */
[data-theme="dark"] {
  --background: 222.2 84% 4.9%;
  --foreground: 210 40% 98%;
  --card: 222.2 84% 4.9%;
  --card-foreground: 210 40% 98%;
}
2. 使用 CSS 变量
typescript
// 在组件中使用 CSS 变量
export function ThemedComponent() {
  return (
    <div
      className="p-4 rounded-lg"
      style={{
        backgroundColor: 'hsl(var(--card))',
        color: 'hsl(var(--card-foreground))',
        borderRadius: 'var(--radius-lg)',
      }}
    >
      <h2 className="text-lg font-semibold mb-2">主题化组件</h2>
      <p className="text-sm opacity-80">支持动态主题切换</p>
    </div>
  )
}
🔌 插件系统开发
插件接口定义
typescript
// 定义插件接口
export interface Plugin {
  id: string
  name: string
  version: string
  description: string
  author: string
  enabled: boolean

  // 生命周期钩子
  onInstall?: () => void
  onUninstall?: () => void
  onEnable?: () => void
  onDisable?: () => void

  // 功能扩展
  views?: ViewExtension[]
  toolbars?: ToolbarExtension[]
  columns?: ColumnExtension[]
  actions?: ActionExtension[]
}

// 视图扩展接口
export interface ViewExtension {
  id: string
  name: string
  component: React.ComponentType
  icon: React.ComponentType
  enabled: boolean
  order: number
}

// 工具栏扩展接口
export interface ToolbarExtension {
  id: string
  component: React.ComponentType
  position: 'left' | 'right'
  order: number
  enabled: boolean
}

// 列扩展接口
export interface ColumnExtension {
  id: string
  type: string
  renderer: (value: any, row: TaskData, column: ColumnConfig) => React.ReactNode
  editor?: (value: any, onChange: (value: any) => void) => React.ReactNode
  validator?: (value: any) => string | null
}

// 操作扩展接口
export interface ActionExtension {
  id: string
  name: string
  icon: React.ComponentType
  action: (data: any) => void
  enabled: boolean
  visible: (data: any) => boolean
}
插件管理器
typescript
// 插件管理器
export class PluginManager {
  private plugins: Map<string, Plugin> = new Map()
  private extensions: {
    views: ViewExtension[]
    toolbars: ToolbarExtension[]
    columns: ColumnExtension[]
    actions: ActionExtension[]
  } = {
    views: [],
    toolbars: [],
    columns: [],
    actions: []
  }

  // 注册插件
  registerPlugin(plugin: Plugin): void {
    if (this.plugins.has(plugin.id)) {
      throw new Error(`Plugin ${plugin.id} already registered`)
    }

    this.plugins.set(plugin.id, plugin)

    // 注册扩展
    if (plugin.views) {
      this.extensions.views.push(...plugin.views)
    }
    if (plugin.toolbars) {
      this.extensions.toolbars.push(...plugin.toolbars)
    }
    if (plugin.columns) {
      this.extensions.columns.push(...plugin.columns)
    }
    if (plugin.actions) {
      this.extensions.actions.push(...plugin.actions)
    }

    // 调用安装钩子
    if (plugin.onInstall) {
      plugin.onInstall()
    }
  }

  // 卸载插件
  unregisterPlugin(pluginId: string): void {
    const plugin = this.plugins.get(pluginId)
    if (!plugin) return

    // 移除扩展
    this.extensions.views = this.extensions.views.filter(v => !plugin.views?.find(pv => pv.id === v.id))
    this.extensions.toolbars = this.extensions.toolbars.filter(t => !plugin.toolbars?.find(pt => pt.id === t.id))
    this.extensions.columns = this.extensions.columns.filter(c => !plugin.columns?.find(pc => pc.id === c.id))
    this.extensions.actions = this.extensions.actions.filter(a => !plugin.actions?.find(pa => pa.id === a.id))

    // 调用卸载钩子
    if (plugin.onUninstall) {
      plugin.onUninstall()
    }

    this.plugins.delete(pluginId)
  }

  // 获取扩展
  getExtensions<T extends keyof typeof this.extensions>(type: T): typeof this.extensions[T] {
    return this.extensions[type].filter(ext => ext.enabled)
  }

  // 启用插件
  enablePlugin(pluginId: string): void {
    const plugin = this.plugins.get(pluginId)
    if (plugin && plugin.onEnable) {
      plugin.onEnable()
    }
  }

  // 禁用插件
  disablePlugin(pluginId: string): void {
    const plugin = this.plugins.get(pluginId)
    if (plugin && plugin.onDisable) {
      plugin.onDisable()
    }
  }
}

// 创建全局插件管理器实例
export const pluginManager = new PluginManager()
插件开发示例
typescript
// 示例插件:高级统计插件
export const AdvancedStatsPlugin: Plugin = {
  id: 'advanced-stats',
  name: '高级统计',
  version: '1.0.0',
  description: '提供高级数据统计功能',
  author: 'Developer',
  enabled: true,

  onInstall: () => {
    console.log('高级统计插件已安装')
  },

  onUninstall: () => {
    console.log('高级统计插件已卸载')
  },

  views: [
    {
      id: 'advanced-stats-view',
      name: '高级统计视图',
      component: AdvancedStatsView,
      icon: BarChart3,
      enabled: true,
      order: 10
    }
  ],

  toolbars: [
    {
      id: 'stats-export',
      component: StatsExportButton,
      position: 'right',
      order: 5,
      enabled: true
    }
  ],

  columns: [
    {
      id: 'completion-rate',
      type: 'completion-rate',
      renderer: (value, row, column) => (
        <div className="flex items-center space-x-2">
          <div className="w-16 bg-gray-200 rounded-full h-2">
            <div
              className="bg-green-500 h-2 rounded-full"
              style={{ width: `${value}%` }}
            />
          </div>
          <span className="text-sm text-gray-600">{value}%</span>
        </div>
      ),
      editor: (value, onChange) => (
        <input
          type="range"
          min="0"
          max="100"
          value={value}
          onChange={(e) => onChange(parseInt(e.target.value))}
          className="w-full"
        />
      ),
      validator: (value) => {
        if (value < 0 || value > 100) {
          return '完成率必须在 0-100 之间'
        }
        return null
      }
    }
  ],

  actions: [
    {
      id: 'generate-report',
      name: '生成报告',
      icon: FileText,
      action: (data) => {
        // 生成报告逻辑
        console.log('生成报告:', data)
      },
      enabled: true,
      visible: (data) => data.length > 0
    }
  ]
}

// 注册插件
pluginManager.registerPlugin(AdvancedStatsPlugin)
🧪 测试指南
单元测试
1. 测试环境配置
bash
# 安装测试依赖
pnpm add -D jest @testing-library/react @testing-library/jest-dom @testing-library/user-event jest-environment-jsdom

# 创建 Jest 配置文件
typescript
// jest.config.js
const nextJest = require('next/jest')

const createJestConfig = nextJest({
  dir: './',
})

const customJestConfig = {
  setupFilesAfterEnv: ['<rootDir>/jest.setup.js'],
  testEnvironment: 'jsdom',
  moduleNameMapping: {
    '^@/(.*)$': '<rootDir>/$1',
  },
}

module.exports = createJestConfig(customJestConfig)
typescript
// jest.setup.js
import '@testing-library/jest-dom'
2. 组件测试示例
typescript
// __tests__/components/enhanced-table-view.test.tsx
import { render, screen, fireEvent } from '@testing-library/react'
import { EnhancedTableView } from '@/components/enhanced-table-view'
import { MultiTableProvider } from '@/components/multi-table-provider'

// 测试数据
const mockTable = {
  id: 'test-table',
  name: '测试表格',
  columns: [
    { id: 'title', title: '标题', width: 200, type: 'text', editable: true, visible: true },
    { id: 'status', title: '状态', width: 100, type: 'select', editable: true, visible: true, options: ['进行中', '已完成'] }
  ],
  data: [
    { id: '1', title: '测试任务1', status: '进行中', priority: '重要紧急', assignee: '张三', startDate: '2024-01-01', dueDate: '2024-01-31', isOverdue: false, progress: '50%', description: '测试描述' },
    { id: '2', title: '测试任务2', status: '已完成', priority: '重要不紧急', assignee: '李四', startDate: '2024-01-01', dueDate: '2024-01-31', isOverdue: false, progress: '100%', description: '测试描述' }
  ],
  groupBy: 'priority',
  filters: {}
}

// 测试包装器
const TestWrapper = ({ children }: { children: React.ReactNode }) => (
  <MultiTableProvider>
    {children}
  </MultiTableProvider>
)

describe('EnhancedTableView', () => {
  it('应该正确渲染表格数据', () => {
    render(
      <TestWrapper>
        <EnhancedTableView />
      </TestWrapper>
    )

    expect(screen.getByText('测试任务1')).toBeInTheDocument()
    expect(screen.getByText('测试任务2')).toBeInTheDocument()
  })

  it('应该支持分组显示', () => {
    render(
      <TestWrapper>
        <EnhancedTableView />
      </TestWrapper>
    )

    expect(screen.getByText('重要紧急')).toBeInTheDocument()
    expect(screen.getByText('重要不紧急')).toBeInTheDocument()
  })

  it('应该支持行拖拽', () => {
    render(
      <TestWrapper>
        <EnhancedTableView />
      </TestWrapper>
    )

    const firstRow = screen.getByText('测试任务1').closest('div')
    expect(firstRow).toHaveAttribute('draggable', 'true')
  })
})
3. Hook 测试示例
typescript
// __tests__/hooks/use-multi-table.test.tsx
import { renderHook, act } from '@testing-library/react'
import { useMultiTable } from '@/hooks/use-multi-table'
import { MultiTableProvider } from '@/components/multi-table-provider'

const TestWrapper = ({ children }: { children: React.ReactNode }) => (
  <MultiTableProvider>
    {children}
  </MultiTableProvider>
)

describe('useMultiTable', () => {
  it('应该返回正确的初始状态', () => {
    const { result } = renderHook(() => useMultiTable(), {
      wrapper: TestWrapper
    })

    expect(result.current.tables).toHaveLength(1)
    expect(result.current.currentTable).toBeDefined()
    expect(result.current.currentTableId).toBe('task-management')
  })

  it('应该能够添加新表格', () => {
    const { result } = renderHook(() => useMultiTable(), {
      wrapper: TestWrapper
    })

    const newTable = {
      id: 'new-table',
      name: '新表格',
      columns: [],
      data: [],
      filters: {}
    }

    act(() => {
      result.current.addTable(newTable)
    })

    expect(result.current.tables).toHaveLength(2)
    expect(result.current.tables[1].id).toBe('new-table')
  })

  it('应该能够更新任务数据', () => {
    const { result } = renderHook(() => useMultiTable(), {
      wrapper: TestWrapper
    })

    const taskId = result.current.currentTable?.data[0]?.id
    if (!taskId) return

    act(() => {
      result.current.updateTaskData(taskId, { title: '更新后的标题' })
    })

    const updatedTask = result.current.currentTable?.data.find(t => t.id === taskId)
    expect(updatedTask?.title).toBe('更新后的标题')
  })
})
集成测试
1. 用户交互测试
typescript
// __tests__/integration/user-interactions.test.tsx
import { render, screen, fireEvent, waitFor } from '@testing-library/react'
import userEvent from '@testing-library/user-event'
import { HomePage } from '@/app/page'
import { MultiTableProvider } from '@/components/multi-table-provider'

const TestWrapper = ({ children }: { children: React.ReactNode }) => (
  <MultiTableProvider>
    {children}
  </MultiTableProvider>
)

describe('用户交互测试', () => {
  it('应该能够创建新表格', async () => {
    const user = userEvent.setup()

    render(
      <TestWrapper>
        <HomePage />
      </TestWrapper>
    )

    // 点击表格管理器
    const tableManager = screen.getByText(/任务管理/)
    await user.click(tableManager)

    // 点击新建表格
    const createButton = screen.getByText('新建表格')
    await user.click(createButton)

    // 填写表格信息
    const nameInput = screen.getByLabelText('表格名称')
    await user.type(nameInput, '新测试表格')

    const descriptionInput = screen.getByLabelText('表格描述')
    await user.type(descriptionInput, '这是一个测试表格')

    // 提交表单
    const submitButton = screen.getByText('创建表格')
    await user.click(submitButton)

    // 验证表格已创建
    await waitFor(() => {
      expect(screen.getByText('新测试表格')).toBeInTheDocument()
    })
  })

  it('应该能够搜索任务', async () => {
    const user = userEvent.setup()

    render(
      <TestWrapper>
        <HomePage />
      </TestWrapper>
    )

    // 在搜索框中输入搜索词
    const searchInput = screen.getByPlaceholderText('搜索任务...')
    await user.type(searchInput, '财务报告')

    // 验证搜索结果
    await waitFor(() => {
      expect(screen.getByText('找到 1 条结果')).toBeInTheDocument()
    })
  })

  it('应该能够拖拽排序任务', async () => {
    const user = userEvent.setup()

    render(
      <TestWrapper>
        <HomePage />
      </TestWrapper>
    )

    // 找到第一个任务行
    const firstTask = screen.getByText('完成年度财务报告').closest('div')
    const secondTask = screen.getByText('组织年度员工团建活动').closest('div')

    if (!firstTask || !secondTask) return

    // 拖拽第一个任务到第二个任务位置
    await user.click(firstTask)
    await user.pointer([
      { target: firstTask, keys: '[MouseLeft>]' },
      { target: secondTask, coords: { x: 0, y: 0 } }
    ])

    // 验证拖拽结果(这里需要根据实际实现调整验证逻辑)
    expect(firstTask).toBeInTheDocument()
  })
})
📦 构建和部署
构建配置
1. Next.js 配置
typescript
// next.config.mjs
/** @type {import('next').NextConfig} */
const nextConfig = {
  // 启用实验性功能
  experimental: {
    // 启用 React 19 特性
    reactCompiler: true,
  },

  // 图片优化配置
  images: {
    domains: ['example.com'],
    formats: ['image/webp', 'image/avif'],
  },

  // 环境变量配置
  env: {
    CUSTOM_KEY: process.env.CUSTOM_KEY,
  },

  // 构建输出配置
  output: 'standalone',

  // 重定向配置
  async redirects() {
    return [
      {
        source: '/old-page',
        destination: '/new-page',
        permanent: true,
      },
    ]
  },

  // 头部配置
  async headers() {
    return [
      {
        source: '/api/:path*',
        headers: [
          { key: 'Access-Control-Allow-Origin', value: '*' },
          { key: 'Access-Control-Allow-Methods', value: 'GET,POST,PUT,DELETE,OPTIONS' },
        ],
      },
    ]
  },
}

export default nextConfig
2. 环境变量配置
bash
# .env.local
NEXT_PUBLIC_APP_NAME=Mute Table Pro
NEXT_PUBLIC_API_URL=http://localhost:3001
NEXT_PUBLIC_ENABLE_ANALYTICS=true

# 私有环境变量
DATABASE_URL=postgresql://user:password@localhost:5432/mute_pro
JWT_SECRET=your-secret-key
bash
# .env.production
NEXT_PUBLIC_APP_NAME=Mute Table Pro
NEXT_PUBLIC_API_URL=https://api.yourdomain.com
NEXT_PUBLIC_ENABLE_ANALYTICS=true

DATABASE_URL=postgresql://user:password@prod-db:5432/mute_pro
JWT_SECRET=your-production-secret-key
部署配置
1. Docker 部署
dockerfile
# Dockerfile
FROM node:18-alpine AS base

# 安装依赖
FROM base AS deps
RUN apk add --no-cache libc6-compat
WORKDIR /app

# 复制包管理文件
COPY package.json pnpm-lock.yaml* ./
RUN npm install -g pnpm && pnpm install --frozen-lockfile

# 构建应用
FROM base AS builder
WORKDIR /app
COPY --from=deps /app/node_modules ./node_modules
COPY . .

# 设置环境变量
ENV NEXT_TELEMETRY_DISABLED 1

# 构建应用
RUN npm run build

# 生产环境
FROM base AS runner
WORKDIR /app

ENV NODE_ENV production
ENV NEXT_TELEMETRY_DISABLED 1

RUN addgroup --system --gid 1001 nodejs
RUN adduser --system --uid 1001 nextjs

# 复制构建产物
COPY --from=builder /app/public ./public
COPY --from=builder --chown=nextjs:nodejs /app/.next/standalone ./
COPY --from=builder --chown=nextjs:nodejs /app/.next/static ./.next/static

USER nextjs

EXPOSE 3000

ENV PORT 3000
ENV HOSTNAME "0.0.0.0"

CMD ["node", "server.js"]
2. Docker Compose 配置
yaml
# docker-compose.yml
version: '3.8'

services:
  app:
    build: .
    ports:
      - "3000:3000"
    environment:
      - NODE_ENV=production
      - DATABASE_URL=postgresql://user:password@db:5432/mute_pro
    depends_on:
      - db
    restart: unless-stopped

  db:
    image: postgres:15-alpine
    environment:
      - POSTGRES_DB=mute_pro
      - POSTGRES_USER=user
      - POSTGRES_PASSWORD=password
    volumes:
      - postgres_data:/var/lib/postgresql/data
    restart: unless-stopped

  nginx:
    image: nginx:alpine
    ports:
      - "80:80"
      - "443:443"
    volumes:
      - ./nginx.conf:/etc/nginx/nginx.conf
      - ./ssl:/etc/nginx/ssl
    depends_on:
      - app
    restart: unless-stopped

volumes:
  postgres_data:
3. Nginx 配置
nginx
# nginx.conf
events {
    worker_connections 1024;
}

http {
    upstream app {
        server app:3000;
    }

    server {
        listen 80;
        server_name yourdomain.com;
        return 301 https://$server_name$request_uri;
    }

    server {
        listen 443 ssl http2;
        server_name yourdomain.com;

        ssl_certificate /etc/nginx/ssl/cert.pem;
        ssl_certificate_key /etc/nginx/ssl/key.pem;

        # 安全配置
        ssl_protocols TLSv1.2 TLSv1.3;
        ssl_ciphers ECDHE-RSA-AES128-GCM-SHA256:ECDHE-RSA-AES256-GCM-SHA384;
        ssl_prefer_server_ciphers off;

        # 代理到应用
        location / {
            proxy_pass http://app;
            proxy_http_version 1.1;
            proxy_set_header Upgrade $http_upgrade;
            proxy_set_header Connection 'upgrade';
            proxy_set_header Host $host;
            proxy_set_header X-Real-IP $remote_addr;
            proxy_set_header X-Forwarded-For $proxy_add_x_forwarded_for;
            proxy_set_header X-Forwarded-Proto $scheme;
            proxy_cache_bypass $http_upgrade;
        }

        # 静态资源缓存
        location /_next/static {
            proxy_pass http://app;
            expires 1y;
            add_header Cache-Control "public, immutable";
        }
    }
}
CI/CD 配置
1. GitHub Actions
yaml
# .github/workflows/deploy.yml
name: Deploy to Production

on:
  push:
    branches: [main]

jobs:
  deploy:
    runs-on: ubuntu-latest

    steps:
      - name: Checkout code
        uses: actions/checkout@v4

      - name: Setup Node.js
        uses: actions/setup-node@v4
        with:
          node-version: '18'
          cache: 'npm'

      - name: Install dependencies
        run: npm ci

      - name: Run tests
        run: npm test

      - name: Build application
        run: npm run build
        env:
          NEXT_PUBLIC_API_URL: ${{ secrets.NEXT_PUBLIC_API_URL }}

      - name: Deploy to server
        uses: appleboy/ssh-action@v1.0.0
        with:
          host: ${{ secrets.HOST }}
          username: ${{ secrets.USERNAME }}
          key: ${{ secrets.KEY }}
          script: |
            cd /opt/mute-pro
            git pull origin main
            docker-compose down
            docker-compose build --no-cache
            docker-compose up -d
2. 部署脚本
bash
#!/bin/bash
# deploy.sh

set -e

echo "🚀 开始部署 Mute Table Pro..."

# 检查环境
if [ -z "$NODE_ENV" ]; then
    export NODE_ENV=production
fi

# 安装依赖
echo "📦 安装依赖..."
pnpm install --frozen-lockfile

# 运行测试
echo "🧪 运行测试..."
pnpm test

# 构建应用
echo "🔨 构建应用..."
pnpm build

# 重启服务
echo "🔄 重启服务..."
pm2 restart mute-pro || pm2 start npm --name "mute-pro" -- start

echo "✅ 部署完成!"
这是二次开发指南文档,包含了详细的开发流程、扩展方法和部署配置。接下来将继续提供服务端对接、数据流转等详细内容。